Miguel Mclawrence, who is part of the BM St Maarten team, recently rebuilt an old Laser with Honeycomb Core. This was quite a project and as you can see from the pictures, he did a great job. Miguel describes how he did it:
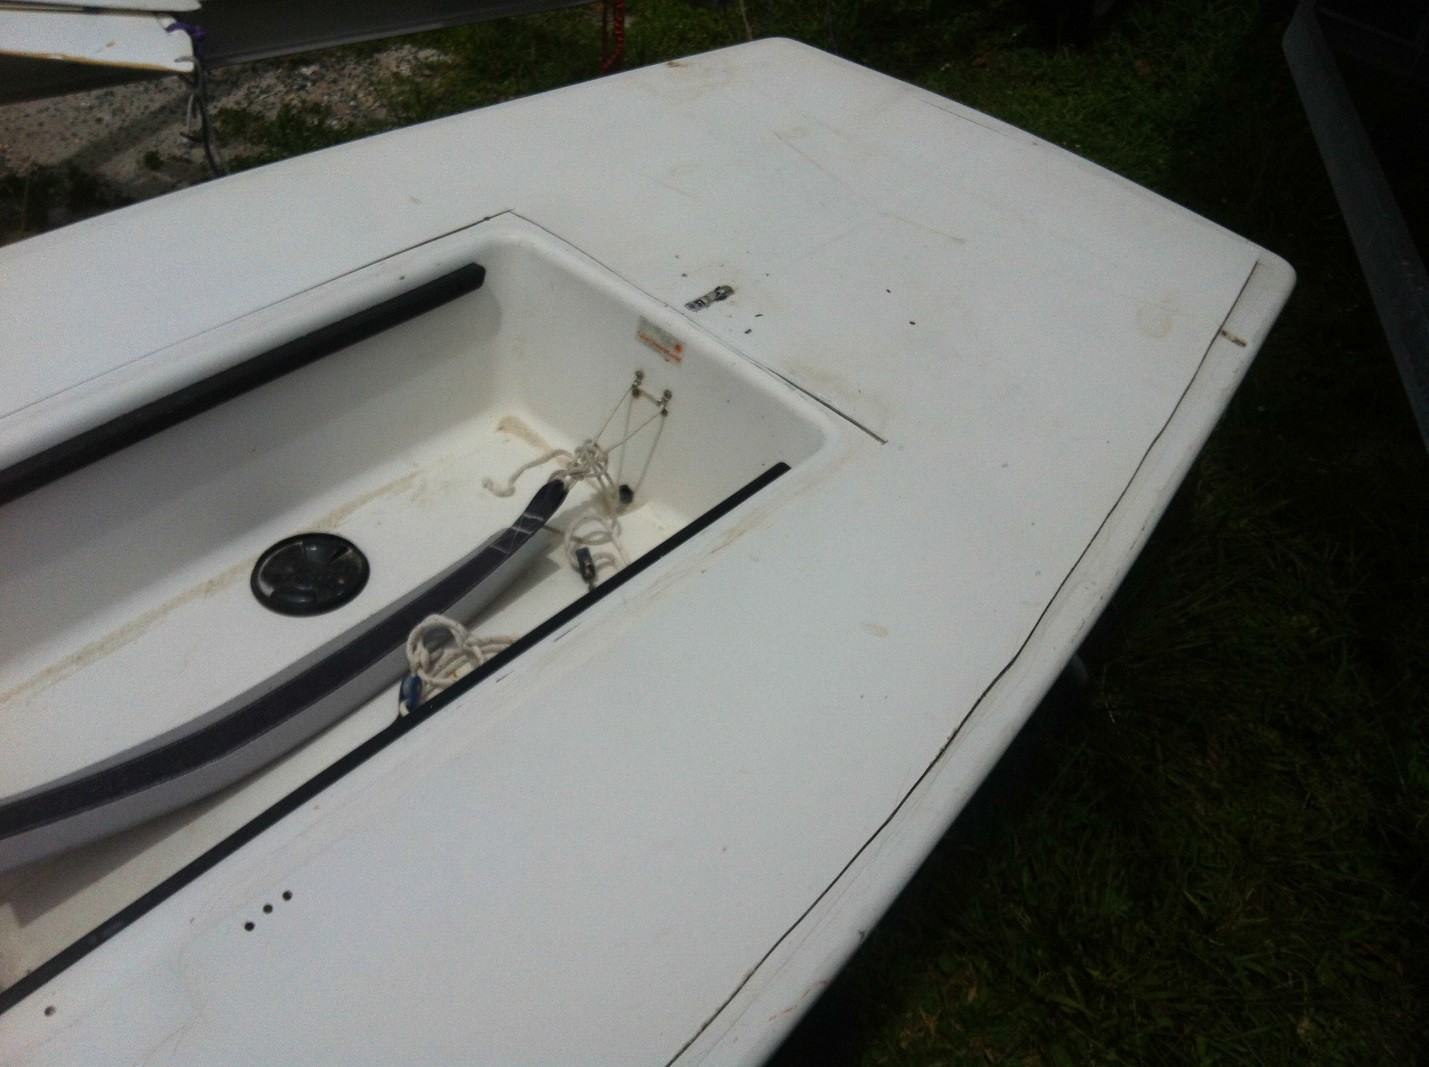
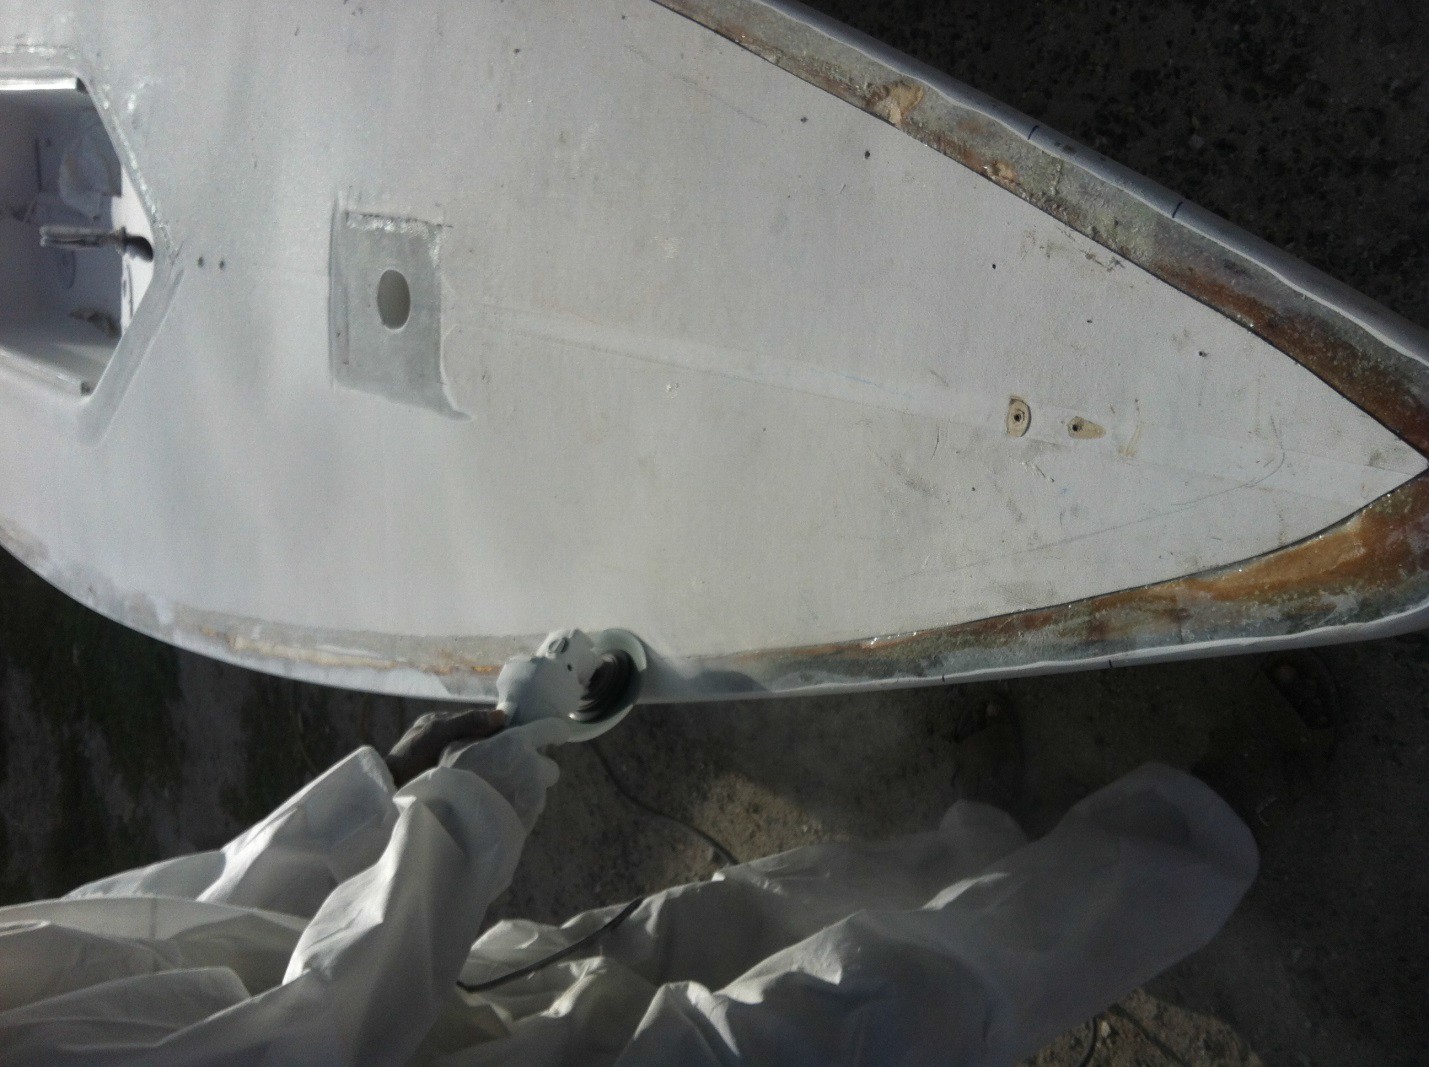
I started by cutting around the edge of the boat, the mast step and cockpit area, so I could then peel off the upper skin for re-use when designing the pattern of the non skid.
Then I removed the sandwich foam between the upper skin and the lower skin. By the time I started scraping off the cracker biscuits, I was getting hungry. Guess we had biscuits, all we needed was a little tea.
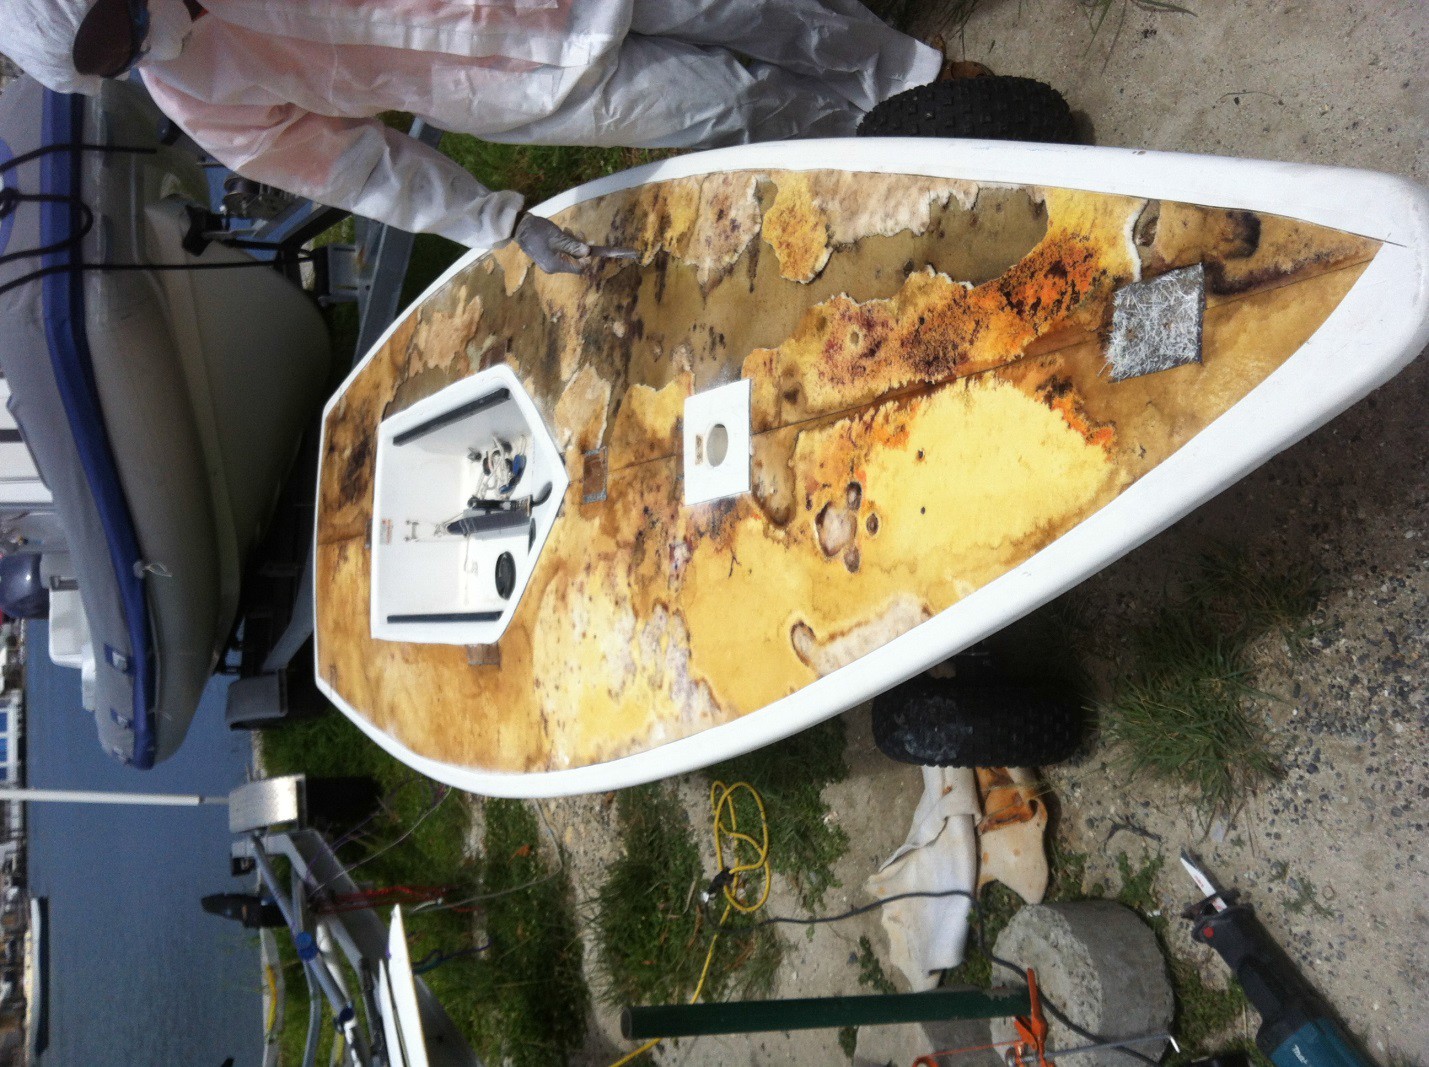
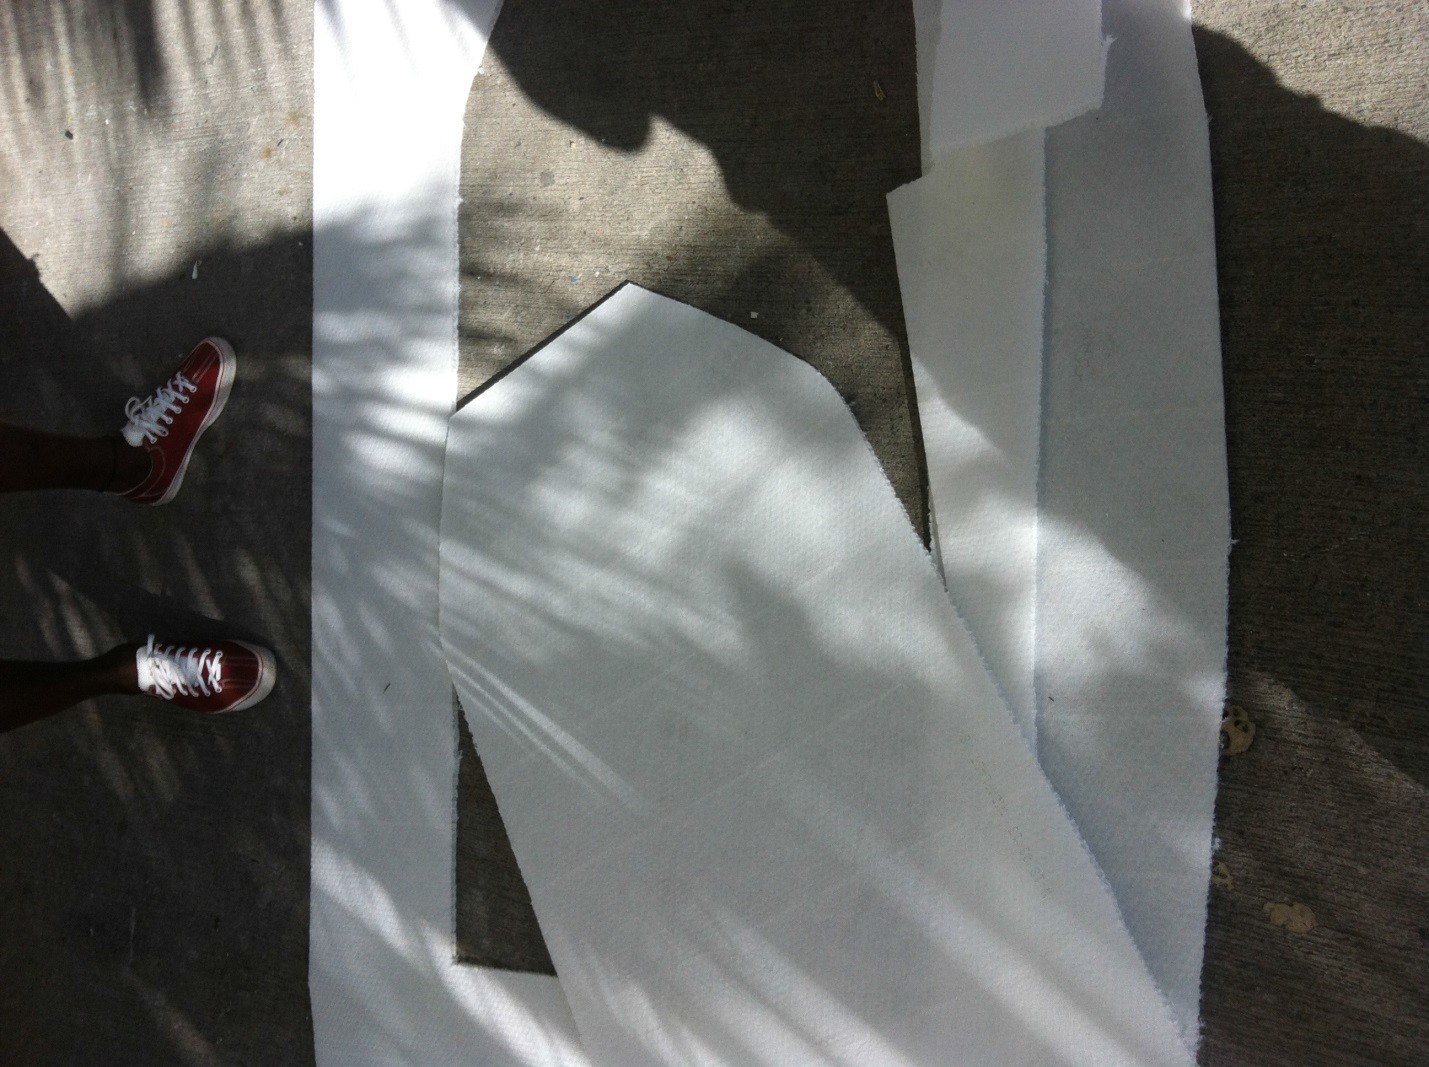
After removing all the dried up foam, the inner layer of the deck was paper thin and could easily be punctured, so I needed to be really careful not to make too many holes – which I managed to do a few times. Then I shaped and measured the Honeycomb Core to mock fit it before sticking it down.
I mixed up the West System 105 Epoxy Resin and the 406 Silica Powder to glue down the Honeycomb Core to the under skin, and used the same mixture to glue the top layer back on to the deck.
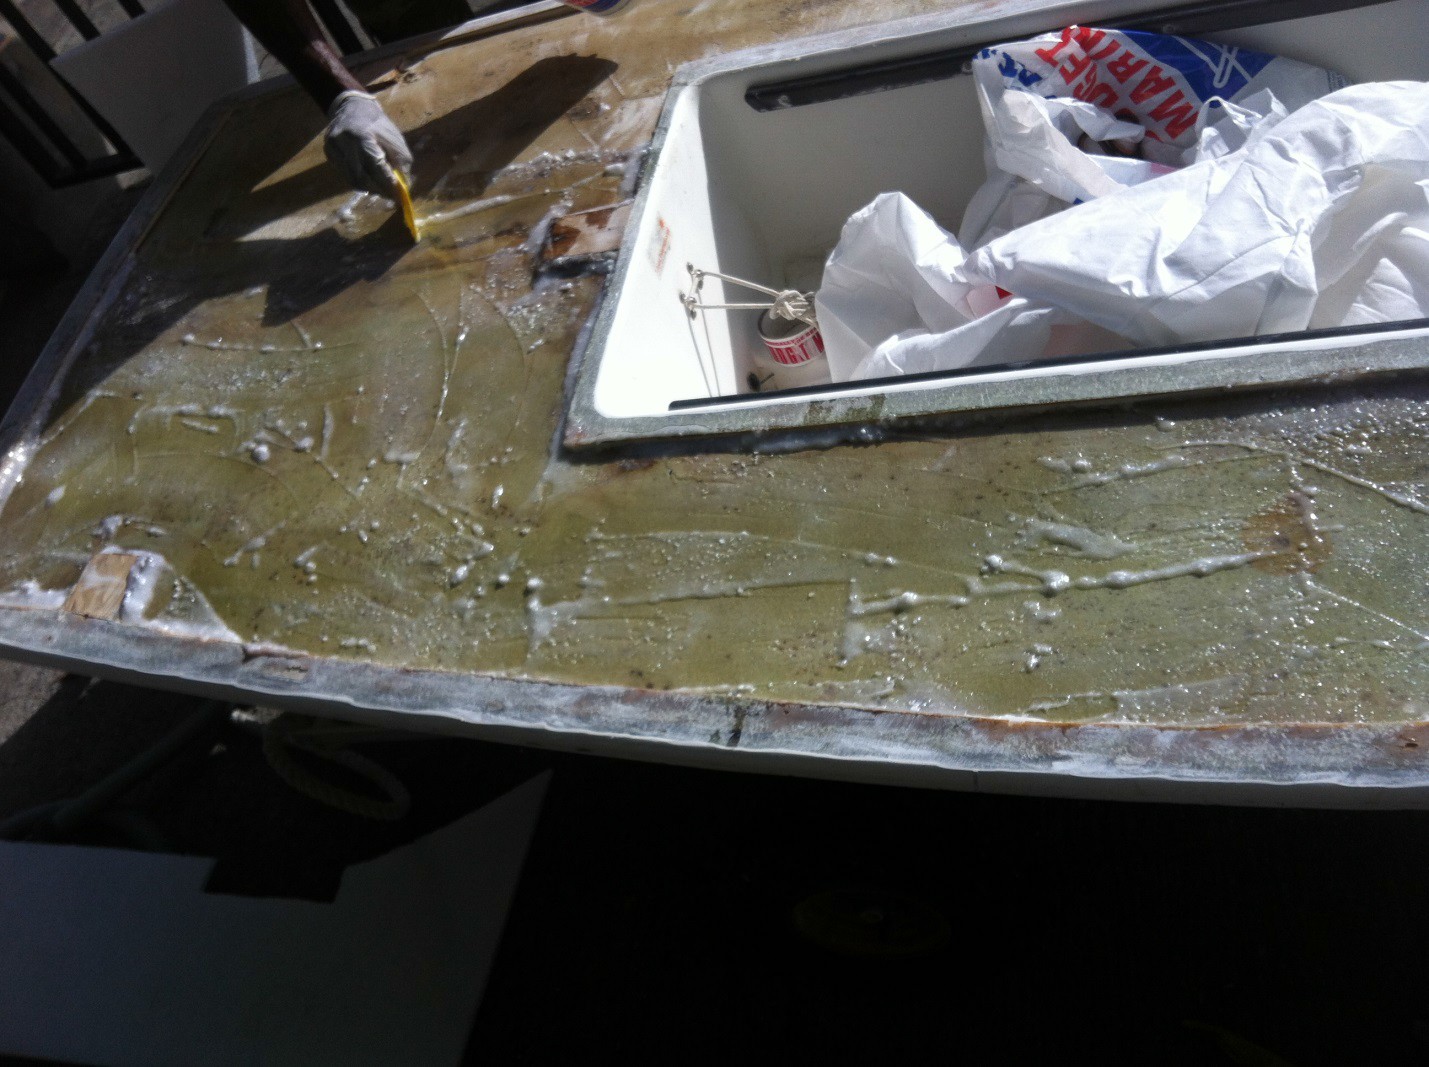
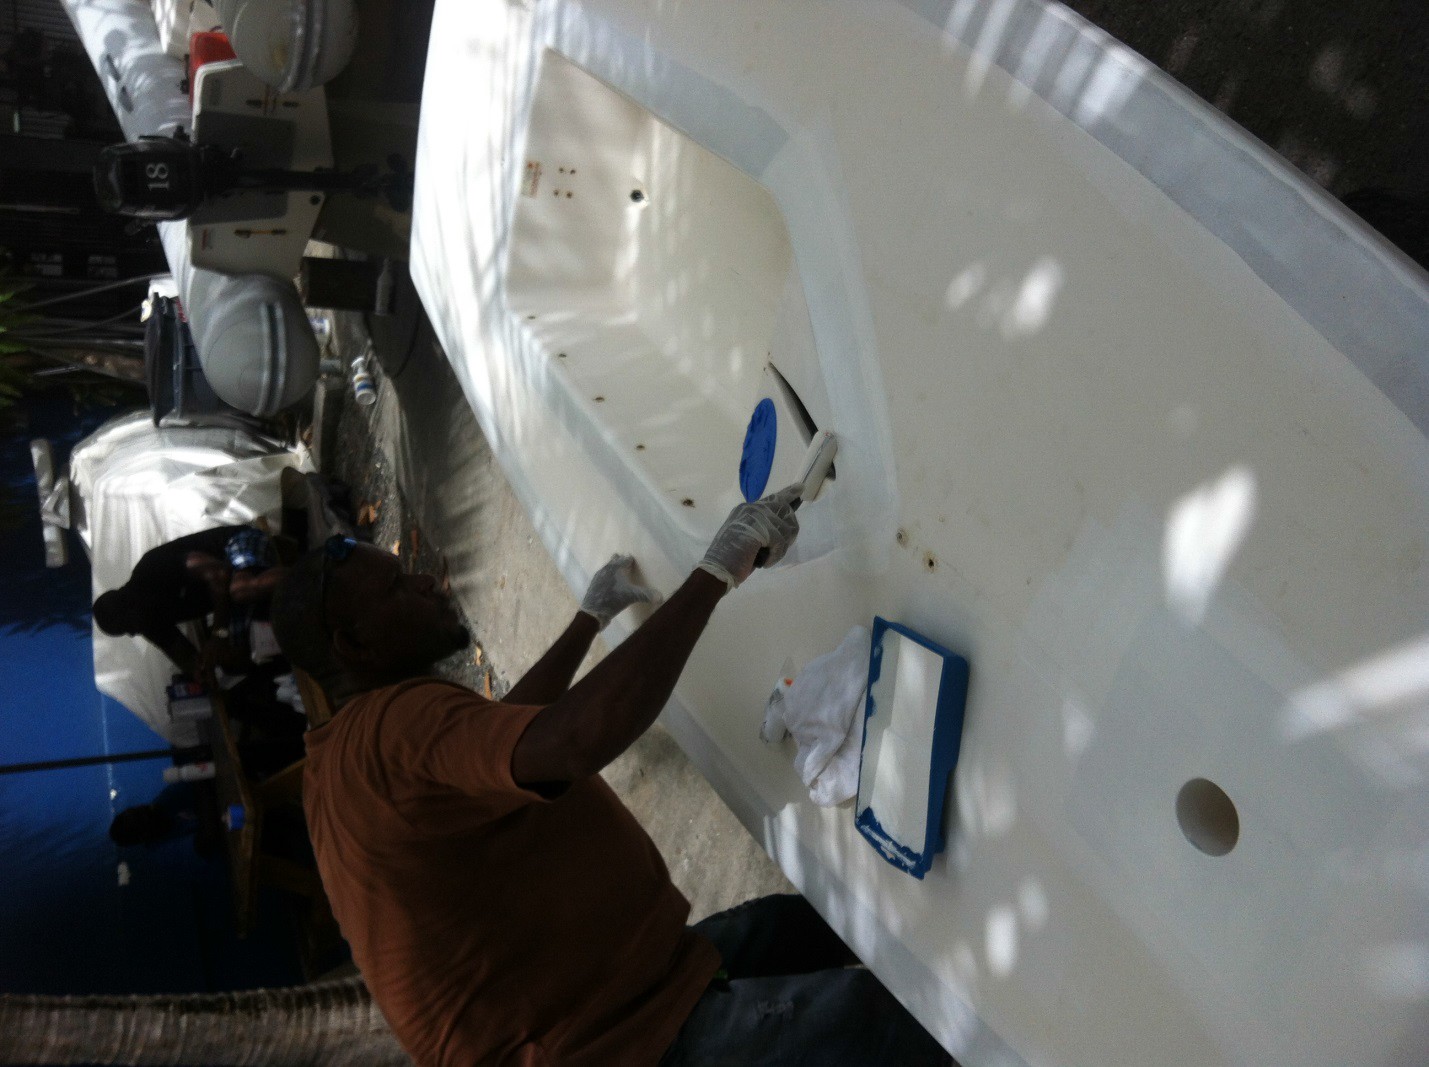
Then the edge was ground down to bare fiber. After this I added some four inch cloth tape around everywhere, ground it down and then added another layer of cloth tape over it. Then it was feather edged to a smooth finish.
After this was done I washed and dried the boat and taped it up to prevent fairing compound from ending up all over the deck. I used West System again for the fairing compound mixing the 105 Epoxy Resin with the 407 low density filler and let it dry overnight.
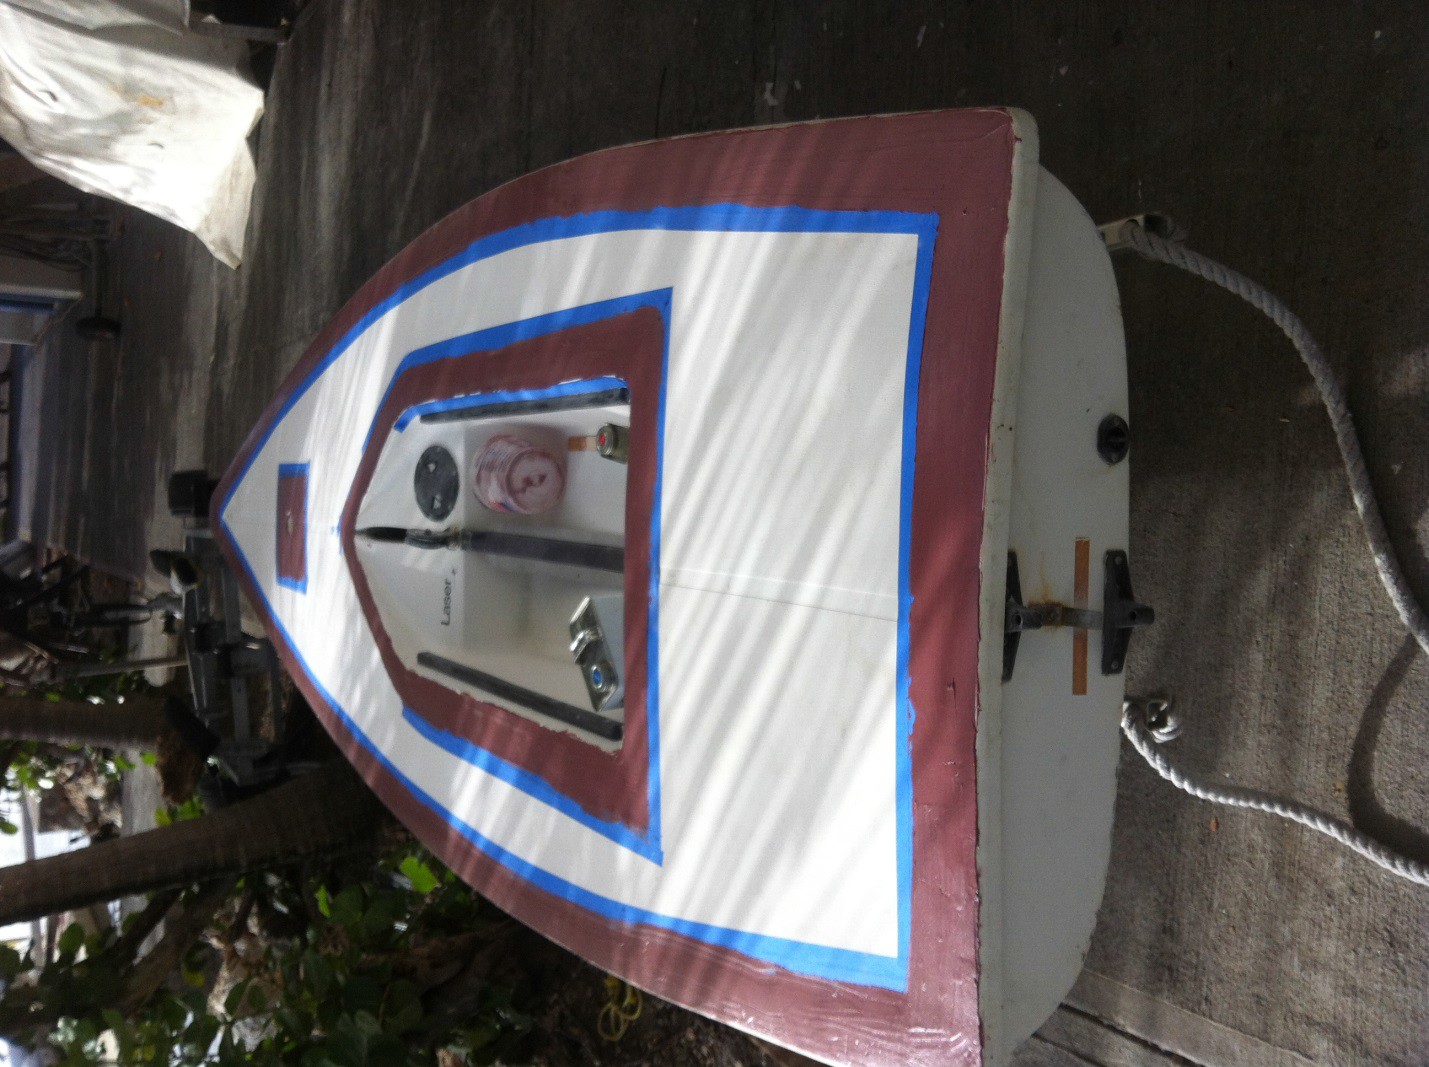
The next day I sanded the laser and prepared it for some fresh layers of gel coat. I put two layers of gel coat on the laser, resanding it inbetween coats and then declared the project finished!
So, are you ready for your own laser rebuild project?