
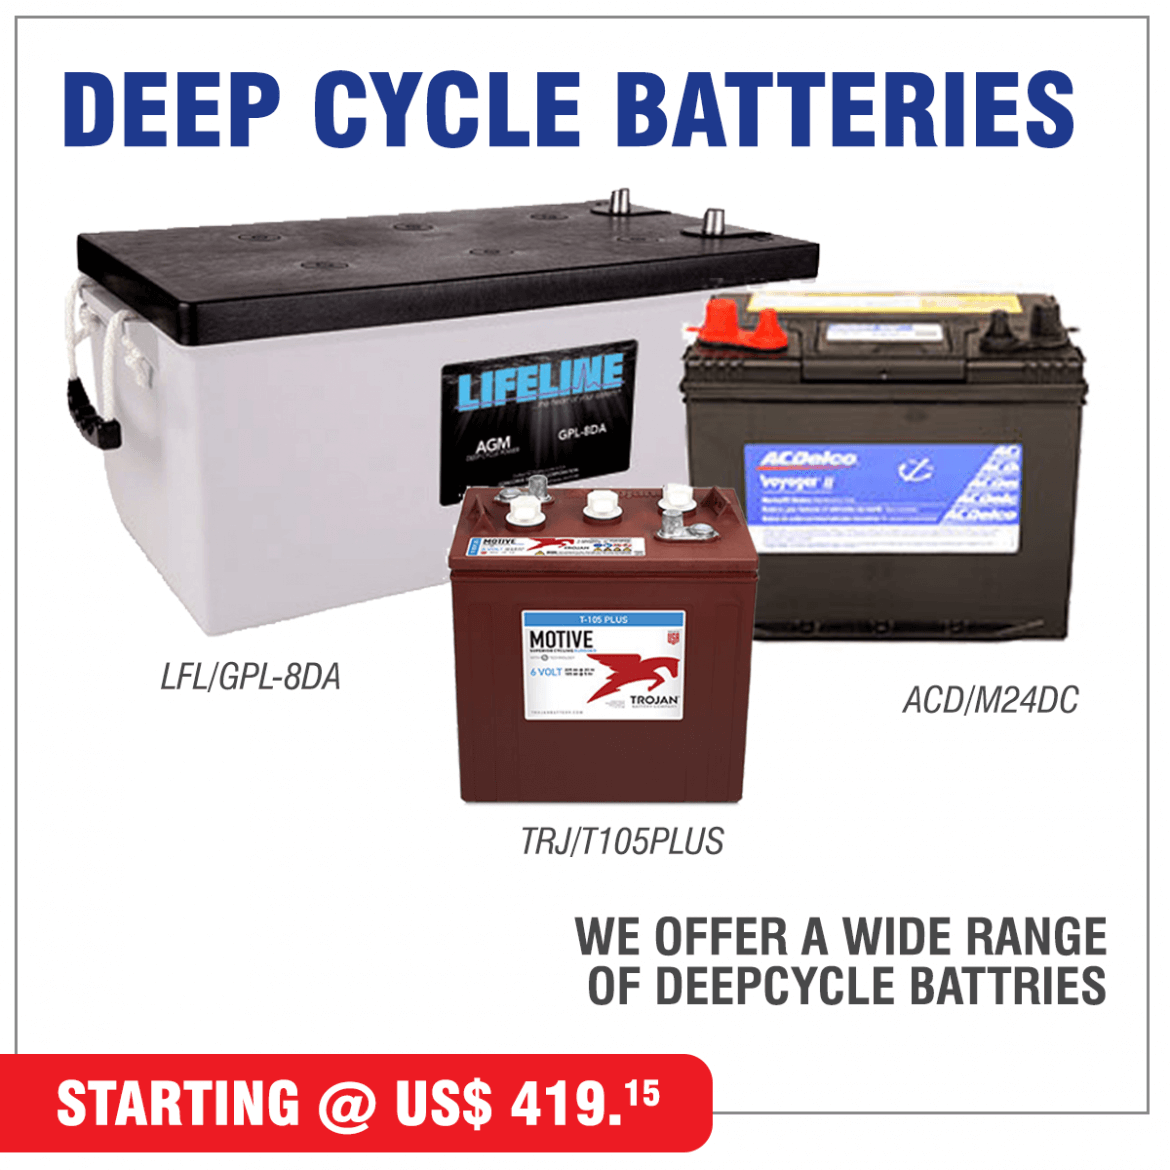
What does “DEEP CYCLE” mean?
If you’ve spent any time shopping for batteries for your electric equipment, you’ve probably noticed that some batteries are labeled as “deep cycle” batteries, while others are not. The difference between these batteries is extremely important to understand if you want a reliable battery experience. Here’s what you need to know:
A deep cycle battery is a battery that is designed to produce steady power output over an extended period of time, discharging the battery significantly, at which point it must be recharged to complete the cycle. By contrast, a regular car battery is designed to provide a momentary burst of energy, typically enough to get your car started, before handing off power production to the alternator. In this case, the battery is not designed to be cycled because it should be kept fully charged at all times.
HOW TO READ DEEP CYCLE BATTERY SPECS
A deep cycle battery is rated by the number of complete cycles that it will provide, as well as the depth of discharge that is allowable, and the amount of amperage that it will produce steadily. For instance, a deep cycle battery listing will tell you that it produces 75 Amp-Hours for a period of 20 hours and is rated for 1,000 full cycles at 80% depth of discharge. These numbers tell you how long the battery will last, how far you should be discharging the battery, how long you can expect to go before you need a battery replacement, and what kind of power you can expect in the meantime. With an ignition lead acid battery, the rating that matters most is the cold cranking amps (CCA), which only tells you how much power the battery can produce in a single burst at 32 degrees.
Now that you understand the differences between deep cycle and regular lead-acid batteries, you will be able to choose the right battery for your needs. Remember, these two battery types may look the same, but their internal components work differently. As a result, deep cycle batteries are more costly than regular batteries, but you should never substitute a regular battery for a deep cycle battery because it won’t be able to handle the work.
Chemical Types:
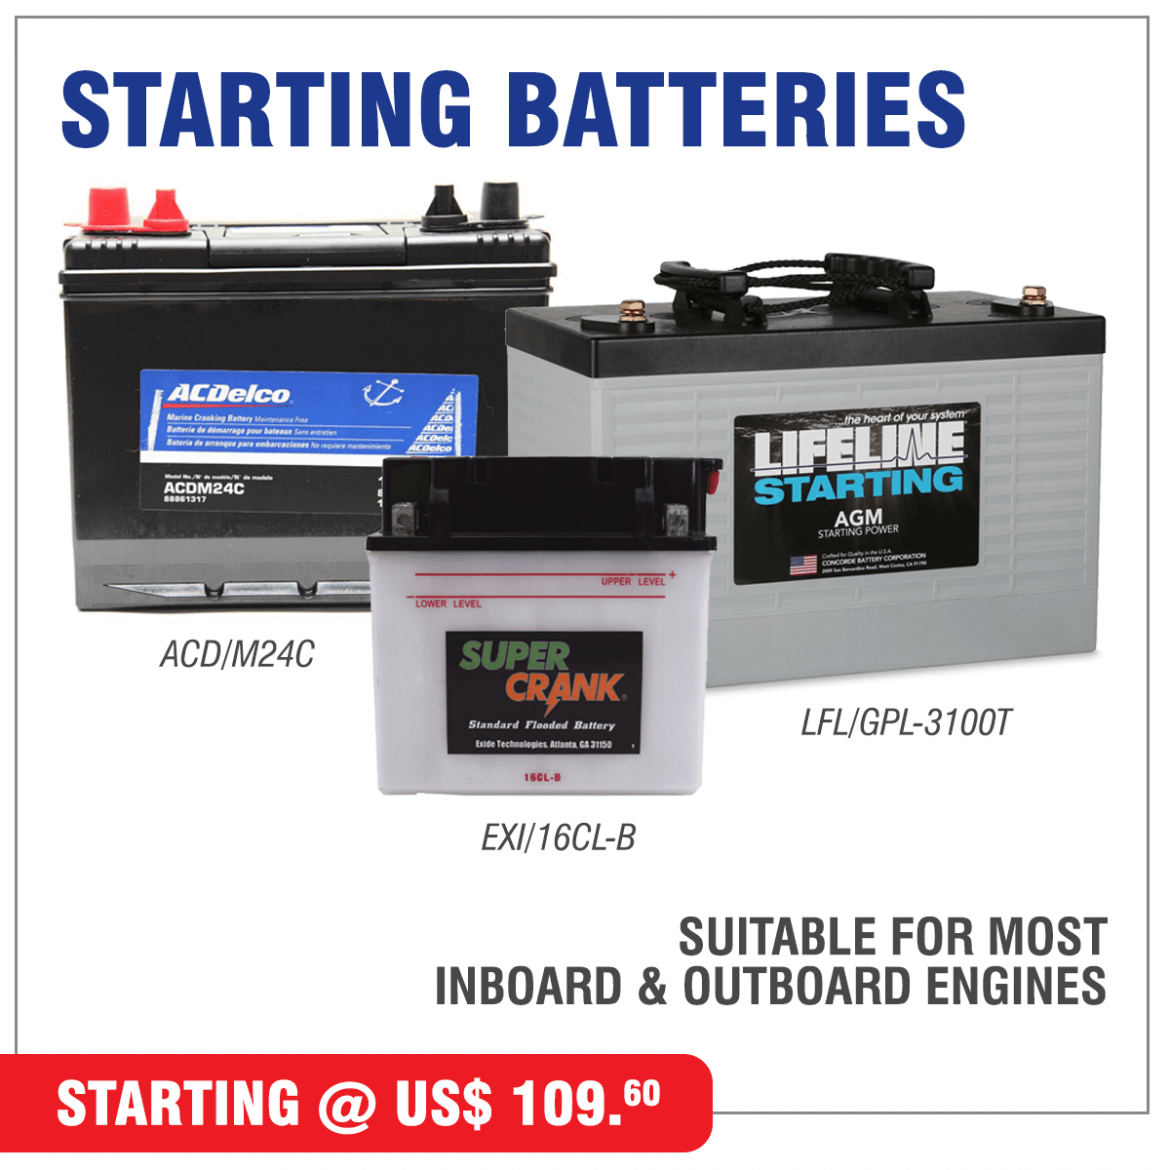
Marine batteries are available in three chemical types: Flooded, Gel, and Absorbed Glass Mat (AGM). Regardless of chemical type, they’re rated by energy output, generally expressed as ampere hours, and categorized by how many charges (cycles) the battery is likely to withstand in its lifetime. The output and lifespan will typically dictate price. The use, chemical type, and the number of batteries best suited to your boat will depend on the kind of boat, how you use it, and your budget.
Flooded Batteries: Wet or flooded batteries following Plante’s design are the most common and cheapest kind of battery found on boats. They use a reservoir of liquid sulfuric acid to act as a pathway between lead plates. This electrolyte produces hydrogen and oxygen when the battery is being charged, requiring vented battery boxes and compartments to let the gas escape safely outside the boat. Due to the heat and outgassing produced during charging, flooded batteries require periodic inspection and topping-off with distilled water. They self-discharge at a higher rate (6 to 7% per month) than AGM or gel batteries, and thus require off-season charging. Wet cells must be installed in an upright position (difficult to maintain on boats) and do not tolerate high amounts of vibration (prevalent on boats). The good news is that used batteries are 98% recyclable, and flooded batteries handle overcharging better than gel and AGM batteries. Wet-cell batteries are also significantly cheaper than the other types.
Gel Batteries: The “gel” is a combination of sulfuric acid, fumed silica, pure water, and phosphoric acid. The gel is quite viscous and prevents leaks if the battery is inverted or the case is damaged. Charging does cause a small amount of hydrogen and oxygen to be generated at the plates, but the pressure inside the cells combines the gases to create water, so they’re called “recombinant” batteries. This also keeps the battery from drying out due to charging. Gel batteries charge at a lower voltage than flooded or glass-mat batteries, requiring a vessel’s charging system to be very carefully regulated to prevent high voltage overcharging.
AGM Batteries: Absorbed Glass Mat batteries feature glass mat separators saturated with acid electrolyte between the battery’s positive and negative plates. During charging, pressure valves allow oxygen produced on the positive plate to migrate to the negative plate and recombine with the hydrogen, producing water. AGM batteries have better shock and vibration protection than wet or gel batteries, and are virtually maintenance-free.
AGM batteries also have lower internal resistance, allowing greater starting power and charge acceptance, and quicker recharging than other types of deep-cycle batteries. AGM batteries can accept the highest charging current, up to 40% of the amp-hour capacity of the battery, compared to about 25% for the flooded type or 30% for the gel—meaning they recharge faster. Long life, a low 3% self-discharge rate, and outstanding performance make AGM batteries excellent dual-purpose batteries for boaters who require quick starting power and reliable deep-cycle ability. Of course, the price matches the quality.
Boaters don’t realize how much their behavior influences how long a battery lasts. On average, a battery that is properly charged and maintained should last at least three years. What do I mean by properly charged? Marine deep-cycle batteries last the longest and charge the fastest if they’re charged in distinct phases, also called the “Ideal Charge Curve.” Since a battery accepts more current when it’s discharged, the amount of voltage required to “properly” charge a battery differs in each phase depending on temperature. In practice, utilizing a smart charger to regulate voltage in each phase, and recharging the batteries the same day they run down will help you get the most out of your batteries.
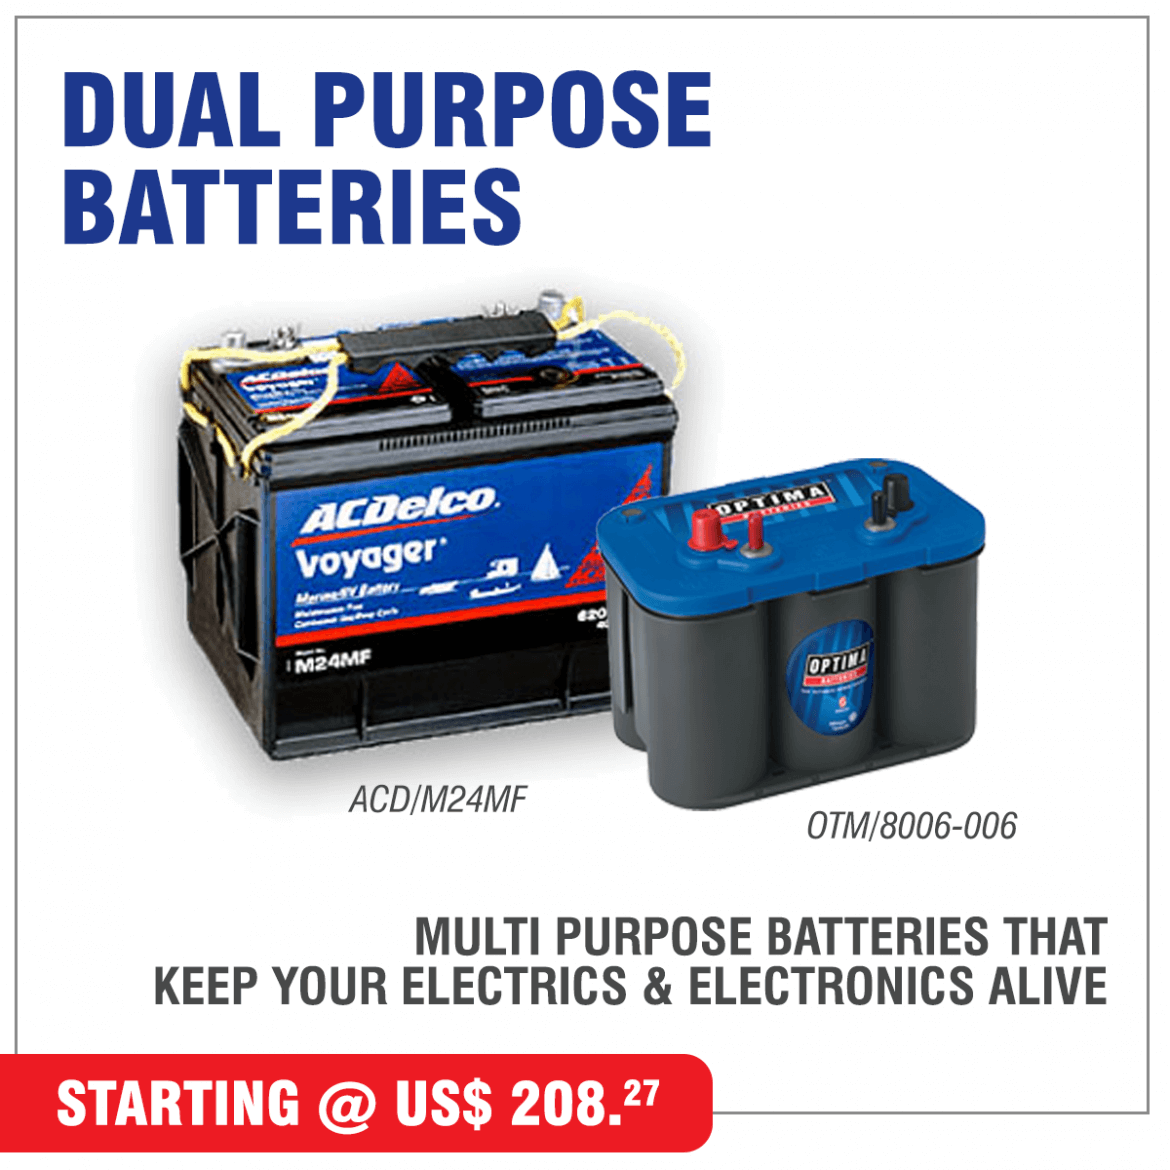
Dual purpose batteries are a good compromise between the starter and deep cycle batteries, especially for boats with only one battery used for both starting and for “house” power when the engine is turned off.
If you’re not into battery maintenance and proper charging, buy the cheaper batteries as you will inevitably be replacing them sooner than later.
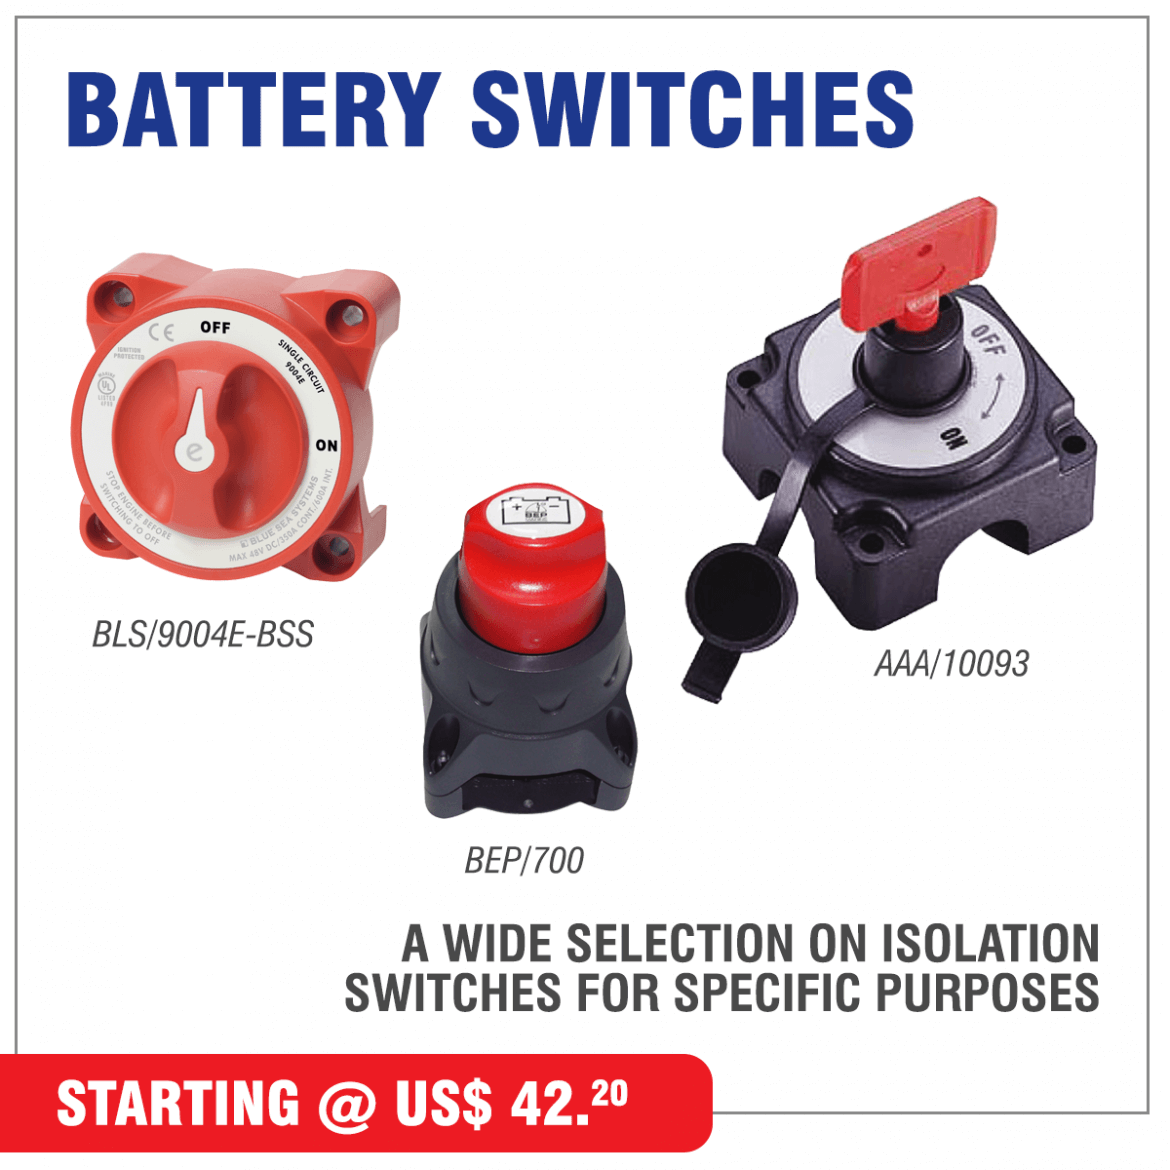
These switches can be mounted in numerous locations. And as ignition protected switches, they can be installed in the engine rooms of gasoline powered boats.
In addition to doing everything a battery disconnect switch does, battery selector switches permit battery selection (of two or more batteries) for specific purposes including starting engines, running accessories, or even recharging. They allow for the use of one or more batteries in systems with one or more engines and facilitate putting batteries in parallel for emergency starting when one or both batteries are substantially discharged.
Perko battery switches are designed for surface mounting.
Standard duty switches have a bright red polycarbonate housing for safety with a large easy-to-turn black knob. The housing of the heavy-duty switches is red fiber-reinforced polycarbonate. Selector switches are designed with a “make before break” feature. This allows switching between the “1”, the “ALL” and the “2” positions while the engine is running. Models with an “Alternator Field Disconnect” feature offer protection for Non-Unitized Alternators, should the switch accidentally be turned to the “OFF” position with the engine running.
The 90° rotation feature allows users to feel the different positions of the switch in no-light situations and the classic shape of the knob makes it easy to turn.
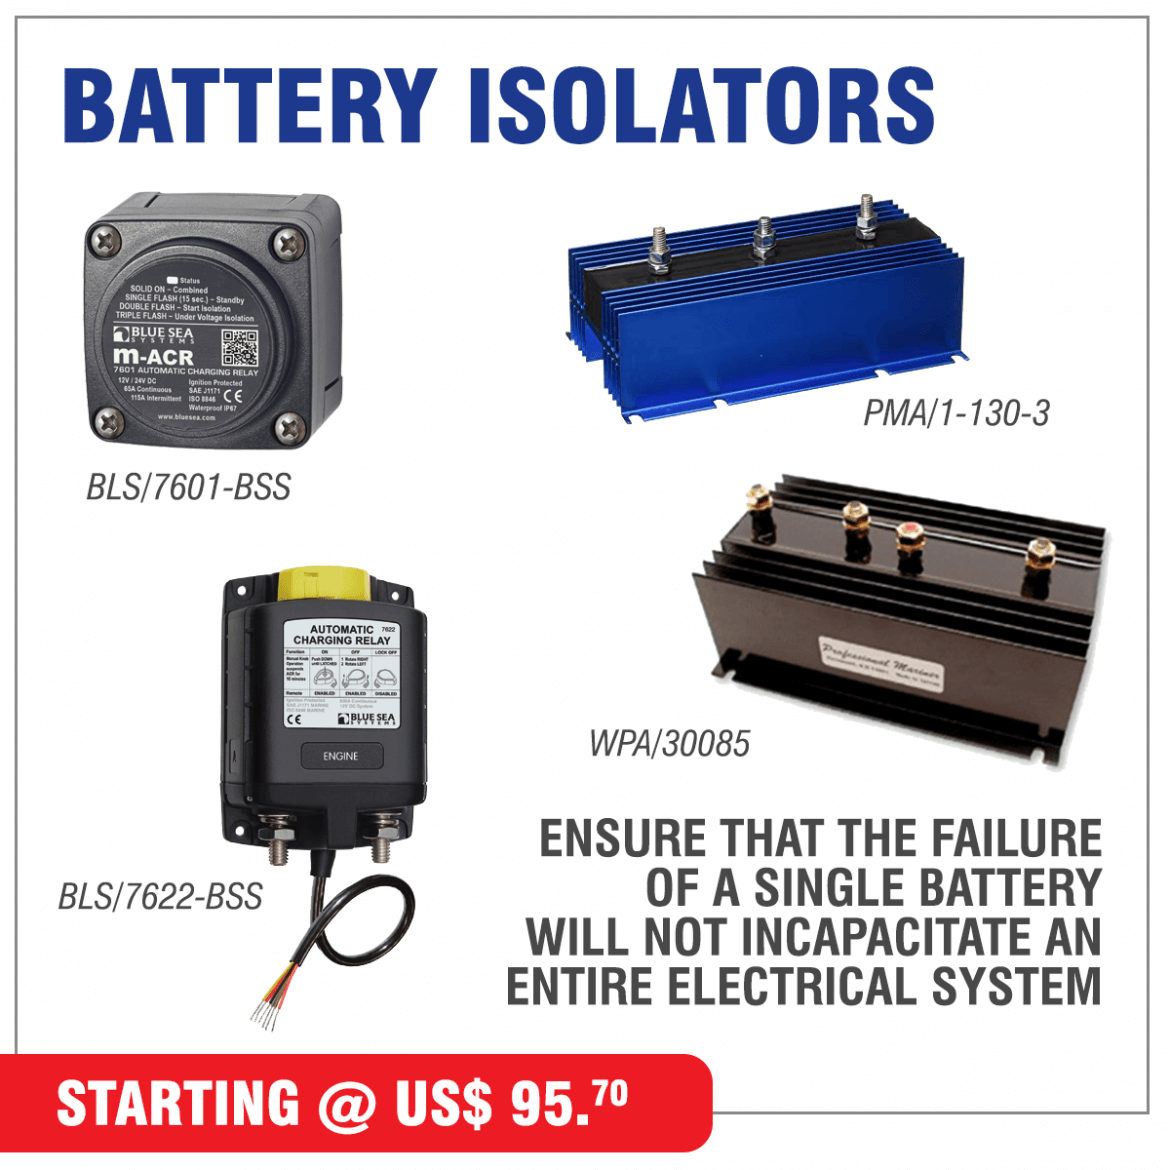
A battery isolator is a one-way electrical battery that allows an electrical current to flow in one direction but not the other. A battery isolator typically is used in situations where multiple batteries are required, and its primary purpose is to ensure that the failure of a single battery will not incapacitate an entire electrical system. Battery isolators are used in large trucks, airplanes, boats, utility vehicles and other vehicles that require multiple batteries and backup sources of power.

A battery isolator separates multiple batteries from one another to ensure that a vehicle has access to a backup power source. In addition, a battery isolator ensures that a vehicle’s electrical system does not pull power from multiple batteries at the same time, which would rapidly drain all the batteries and cause the electrical system to fail. A simple setup is one in which a vehicle contains two batteries, both of which are attached to the isolator. The battery isolator is attached to the vehicle’s alternator, which is the device responsible for providing the vehicle with electrical power and for charging the vehicle’s battery. The battery isolator uses sensors to determine the number of batteries it is connected to and to draw power from the strongest battery. The idle batteries are charged by the alternator, and the battery isolator can switch power sources if the battery in use suddenly fails.
Diode Versus Solenoid Battery Isolators
There are two main types of battery isolators: the diode isolator and the solenoid isolator. A diode isolator uses two high-current diodes to direct the flow of current from the battery to the battery isolator. A diode isolator is not as complex as a solenoid isolator, is easier to maintain and repair and generally lasts longer. A solenoid isolator uses several electrical relays to control the flow of electrical current. One of the relays receives the electrical current from the battery, while the other relay (known as the central relay) monitors the power levels of the idle batteries. Additional relays transmit the charging current from the alternator to the idle batteries. A solenoid battery isolator does not have as much current degradation as a diode isolator and is more efficient.
Optimize Your Battery System
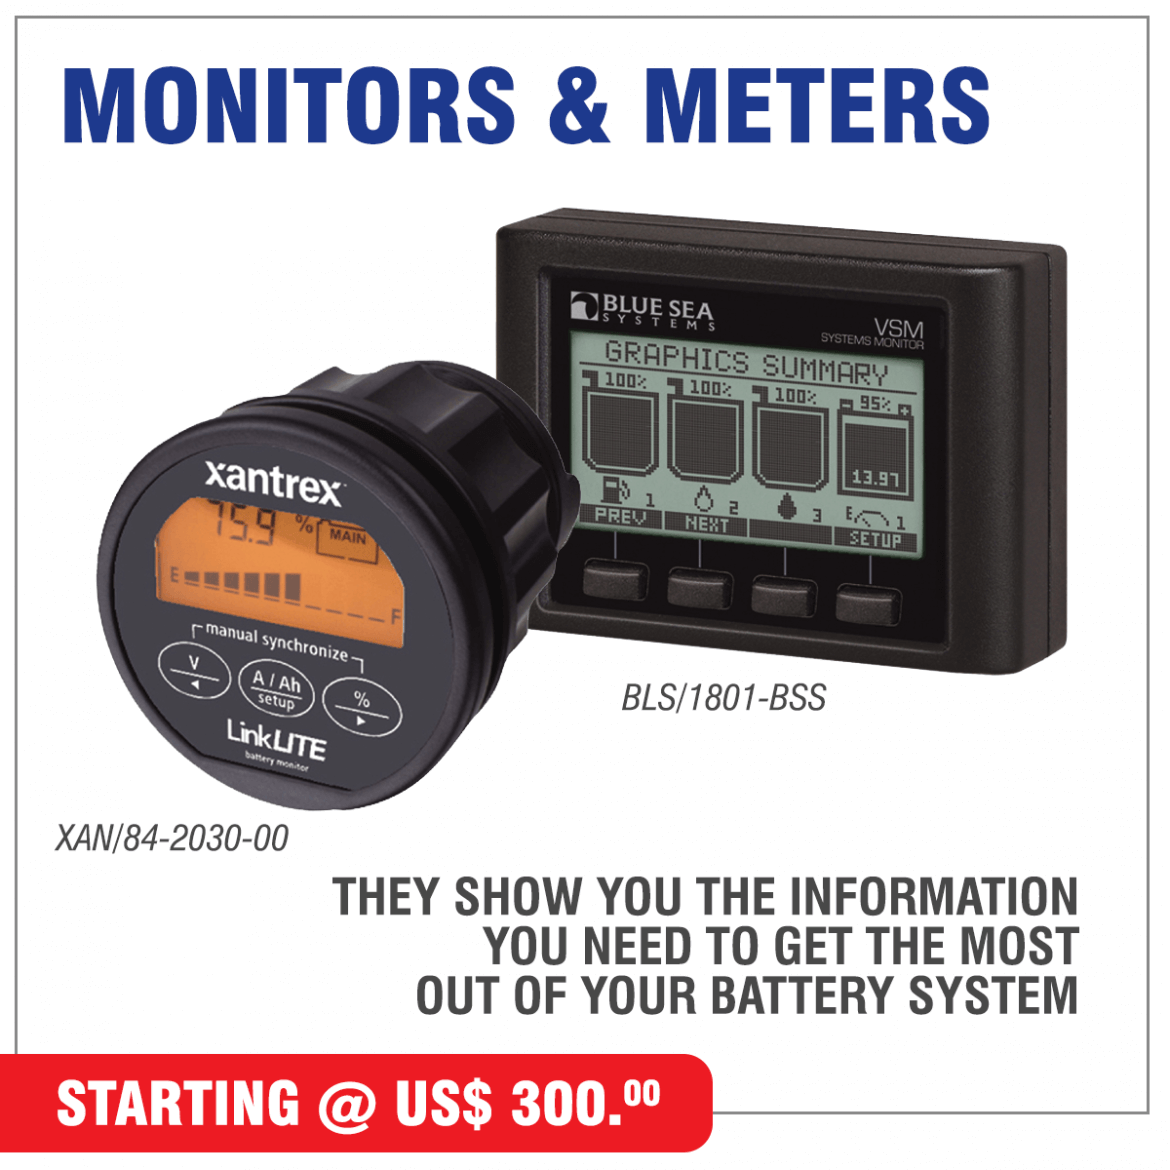
The more information you have on your battery system, the better decisions you can make to optimize its usage. If you’re looking to get the most out of your battery system, a battery monitor is a simple, inexpensive, and fantastic upgrade to consider.
How a Battery Monitor Works
There are two types of battery monitors, shunt-based and voltage-based. The simplest type is the voltage-based monitor and frequently comes standard on most mobile power applications. This type of monitor just measures the real-time voltage of the battery and uses it to estimate its state of charge.
Voltage-based monitors are not very accurate because the real-time voltage of a battery will fluctuate based on temperature changes and other environmental conditions. If you change the battery type the voltage meter may even be completely inaccurate altogether.
The shunt-type monitor is much more accurate because it measures the actual energy flowing into and out of the battery. These battery monitors require a shunt to be installed on the negative side of the battery terminal. The shunt measures the real-time voltage of your battery system as well as the current draw.
The battery monitor uses these measurements to calculate the state of charge, power consumption, estimated remaining runtime, and other beneficial information about your battery system.
Helps You Take Better Care of Your Batteries
Battery monitors do much more than just display the state of charge of your system. Your battery monitor also provides you real-time and historical information on voltage, power consumption, temperature, and more. This data allows you to make better decisions on how to optimize your battery usage and charging.
A good example is deciding when to switch the fridge in your RV from battery power to propane. Perhaps it’s early evening, and your battery monitor says you have four hours of runtime left. However, if you switch your RV fridge to propane, you can make it through the night without needing to run your generator.
If using lead-acid batteries they should not be drained past 50 percent state of charge for optimum longevity. Using an accurate shunt-based monitor will let you know when you are reaching the 50% mark and that they will need to be charged. Lead-acid batteries also take a long time to charge and need to make it through an absorption cycle. Without a battery monitor you may not know when your batteries reach full charge. If they don’t make it to a full charge before draining you will shorten their lifespan.
Marine battery chargers
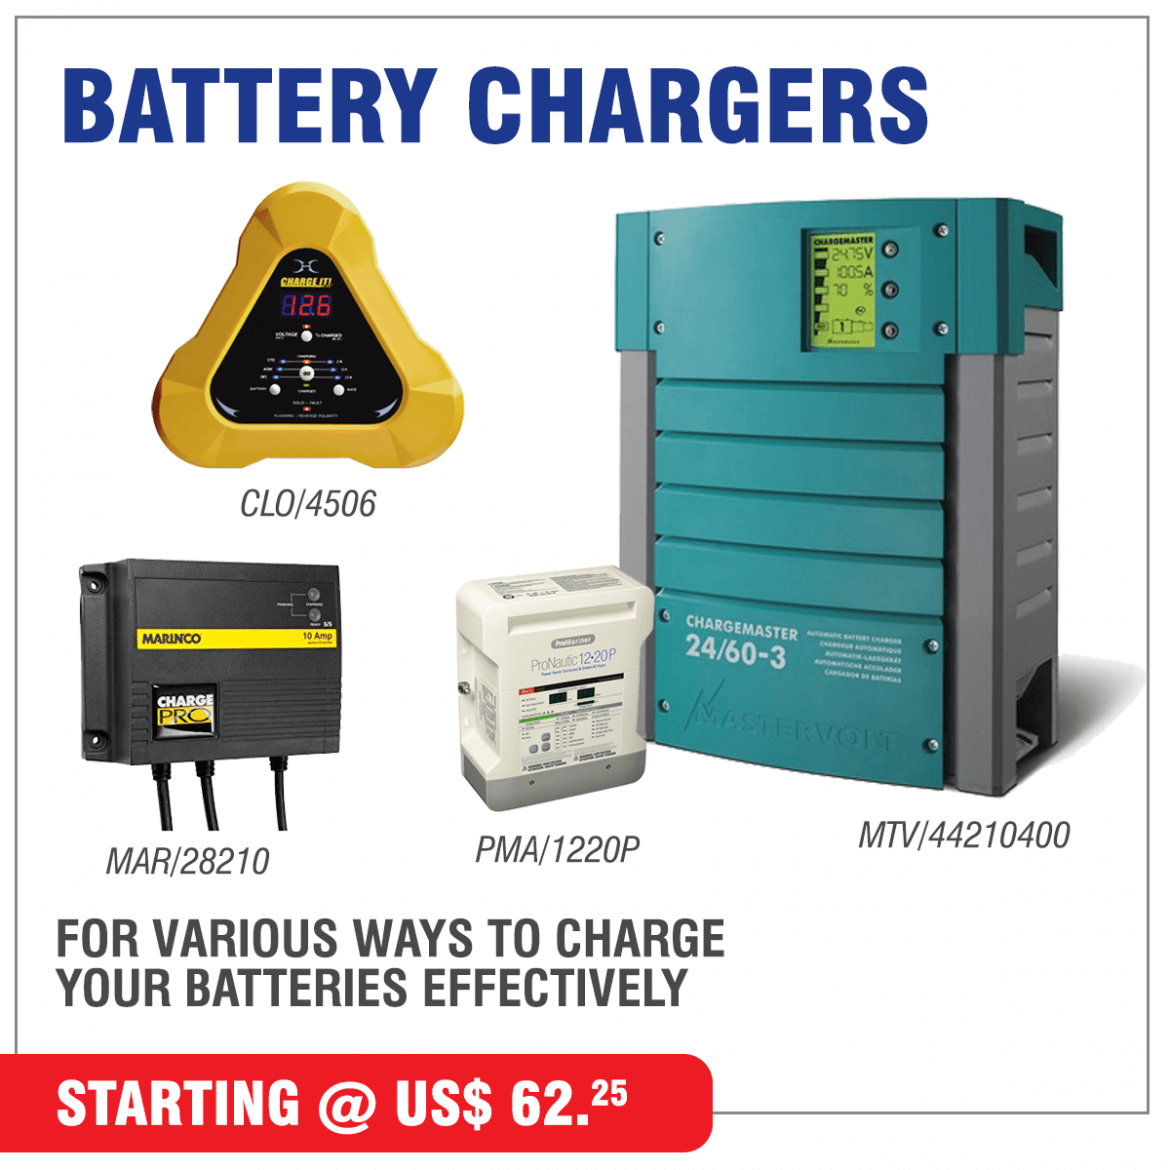
They come in a variety of models, with one or more attributes contributing to their being classified as such. Some of the attributes are:
- Waterproof
- Vibration proof
- Mountable (mounting flanges)
- Multiple bank (multiple outputs) and others.
Applications vary from single starting battery systems, to multi battery systems, where some of the batteries are deeply discharged routinely, as in a trolling motor system in a tournament fishing boat, or an electric-only boat used in smaller lakes or ponds. Some marine applications are live-aboard situations, where shore power is available, and the charger may need to function as a power supply as well.
There are waterproof, vibration proof, mountable, single or multiple bank marine chargers. They are frequently used in smaller open boat applications like bass boats or electric only boats, but they are appropriate for larger applications as well, and even industrial or military applications where sealed quality and temperature compensation comes into play. This charger type is also used for generator or pump starting batteries, where vibration and outdoor environments may be encountered.
The multiple output of some marine chargers is designed in different ways. We usually prefer units that have a separate positive and negative connection for each output, and a separate microprocessor as well. This allows batteries of differing type, size, and state of charge to be connected to the same battery charger. So, a three-bank charger can be used for a three-battery boat with a single 12 volt starting battery, and two other 12 volt batteries in series for a 24 volt trolling motor. How the batteries are wired (i.e. series in this 24 volt situation) is not a concern for the charger, after each battery gets its own positive and negative from the charger.
This attribute can be used to solve a battery charging problem involving higher voltages like 24 or 36 volts, where one of the 12 volt batteries in the string is tapped at 12 volts for lights, radio, etc., resulting in an imbalance. Using a straight 24 volt or 36 volt output charger in this case would result in improper battery charging, and shortened battery life. So, there are some charging applications that are only correctly served by a multi-bank, independent output charger. There are low (4 to 6 amps), medium (10 amps), and high (15 amps) output multi-bank chargers, with one to four banks, such as the Dual Pro line.

Inverters bring a new level of enjoyment to your boat. By supplying 120 volt AC power, inverters allow you to use things such as TVs, other home entertainment equipment, computers, printers, microwaves, and power tools when away from shore power, without using a generator. Inverters operate somewhat like battery chargers in reverse: they take DC power from a battery and, utilizing sophisticated circuitry, change it into 120 volt AC current. The ship’s batteries are the inverter’s fuel tank and, by nature, inverters can consume a lot. They will only provide 120 volt AC power as long as there is ample juice left in the 12 volt batteries. It is strongly recommended that you have a separate, dedicated engine starting battery to avoid accidentally draining the entire 12 volt system.
Inverter, Charger Combos
Modern combination inverter/chargers, as opposed to those same separate devices available for some years now, are built to function as both a multi-stage battery charger and sine-wave inverter in a single box. To this end, they have an AC input that can be connected to dock power or a generator for topping off your batteries, and at least one AC outlet (and often more).
Almost all modern inverters provide a pure sine-wave AC output similar to (and sometimes better than) that found on the domestic grid, to ensure compatibility with all common household appliances, no matter how sensitive.
The more sophisticated models can also detect when shore power or a generator is connected, switching back and forth between invert and charge mode in a matter of milliseconds. This, in turn, provides an Uninterrupted Power Supply (UPS) that allows devices such as PCs to continue operating without forever re-booting.
When connected to shore power and charging, many combos will also provide direct AC to the vessel’s mains outlets at the same time.
While some combos insist on a clean and constant waveform when accepting AC power from an onboard generator, the smarter devices simply adjust the incoming power to compensate. None, however, permit both a generator and the grid to be connected and running simultaneously. Though possible in theory, it would require their waveforms to be precisely synchronized using some very complex (read expensive) circuitry.

A circuit tester is a critical tool for anyone who works with electricity to have.
What is a Clamp Meter?
A clamp meter is an advanced variation of a regular multimeter with the major difference of a jaw-like structure on the top that allows contactless measurement of current and voltage.
You can ‘clamp’ this structure around conductors (a wire, for instance) to detect the current running through it.
With this being the basic principle, modern clamp meters come with functions that enable measurement of several quantities, features that make troubleshooting and analysis easier, and ultimately, more safety measures.
How to Use a Clamp Meter?
Since analog models are not widely in use today and it is recommended that you buy a digital model, we will only focus on the working of a digital clamp meter.
Additionally, in the following guide, the steps are only for measuring DC amps or AC amps. For all other quantities, the process is similar but you will have to select the respective function in the dial.
Steps to Follow While Using a Clamp Meter to Measure Current.
Step 1
Switch ON the meter and remove the probes (if attached)
Step 2
Select the AC current or DC current function using the dial.
The display should show a jaw sign, which will confirm that the measurement is being detected through the clamp (Read the user manual to see how your meter indicates this)
Step 3
Open the jaw-like structure using the side lever and insert the conductor through which the current is to be measured
Technicians can do this with their secondary hand so that measurements can be noted down using the primary one
Step 4
Then close the jaw-like structure and level the conductor between the alignment marks inscribed on the jaws.
If these marks are not shown in your model, try to adjust the conductor in the center of the clamp
Step 5
The display will show the appropriate reading. Users can change the resolution as per requirements, but most meter models do this automatically.
It is recommended that all measurements should be taken for conductors that are insulated properly. DO NOT measure around live wires.
Since you don’t have to manually plug testing probes/leads to live circuits and also don’t have to disconnect the system to take a measurement, clamp meters have quickly become one of the most important tools in an electrician’s life.


